How to set the crop, planting date and season for a field
Tell AgriSync what's growing in a field this season: the crop, planting date, winter or spring sowing, variety and soil. Then satellite crop checks can start.
Last checked against gov.uk
- Written by
- The AgriSync team
- Published
- Reading time
- 2 minutes
In short
Open Crop monitoring, open the field and go to the Crop & soil tab. Press Set crop and choose the Crop. Add the Planting date (optional) and answer Winter or spring crop? Add the Variety and Soil details if you know them. Press Save crop. Satellite checks then start. Earlier seasons stay on record.
What you need
- A field set up in AgriSync
- To be the farm owner or a farm manager
- The planting date, if you know it
Steps
- 1
Open the field in Crop monitoring
In the menu, under Fields, choose Crop monitoring. Does the field show Set crop or Confirm crop in the list? Press it and the form opens straight away. If not, press the arrow to open the field. Then open the Crop & soil tab.
- 2
Start a new season
Press Set crop. If the field already has a crop this season, the button says Change crop.
- 3
Choose the crop
Under What is growing here?, choose the Crop: Feed wheat, Milling wheat, Feed barley, Malting barley or Oilseed rape. These are the crops we check by satellite.
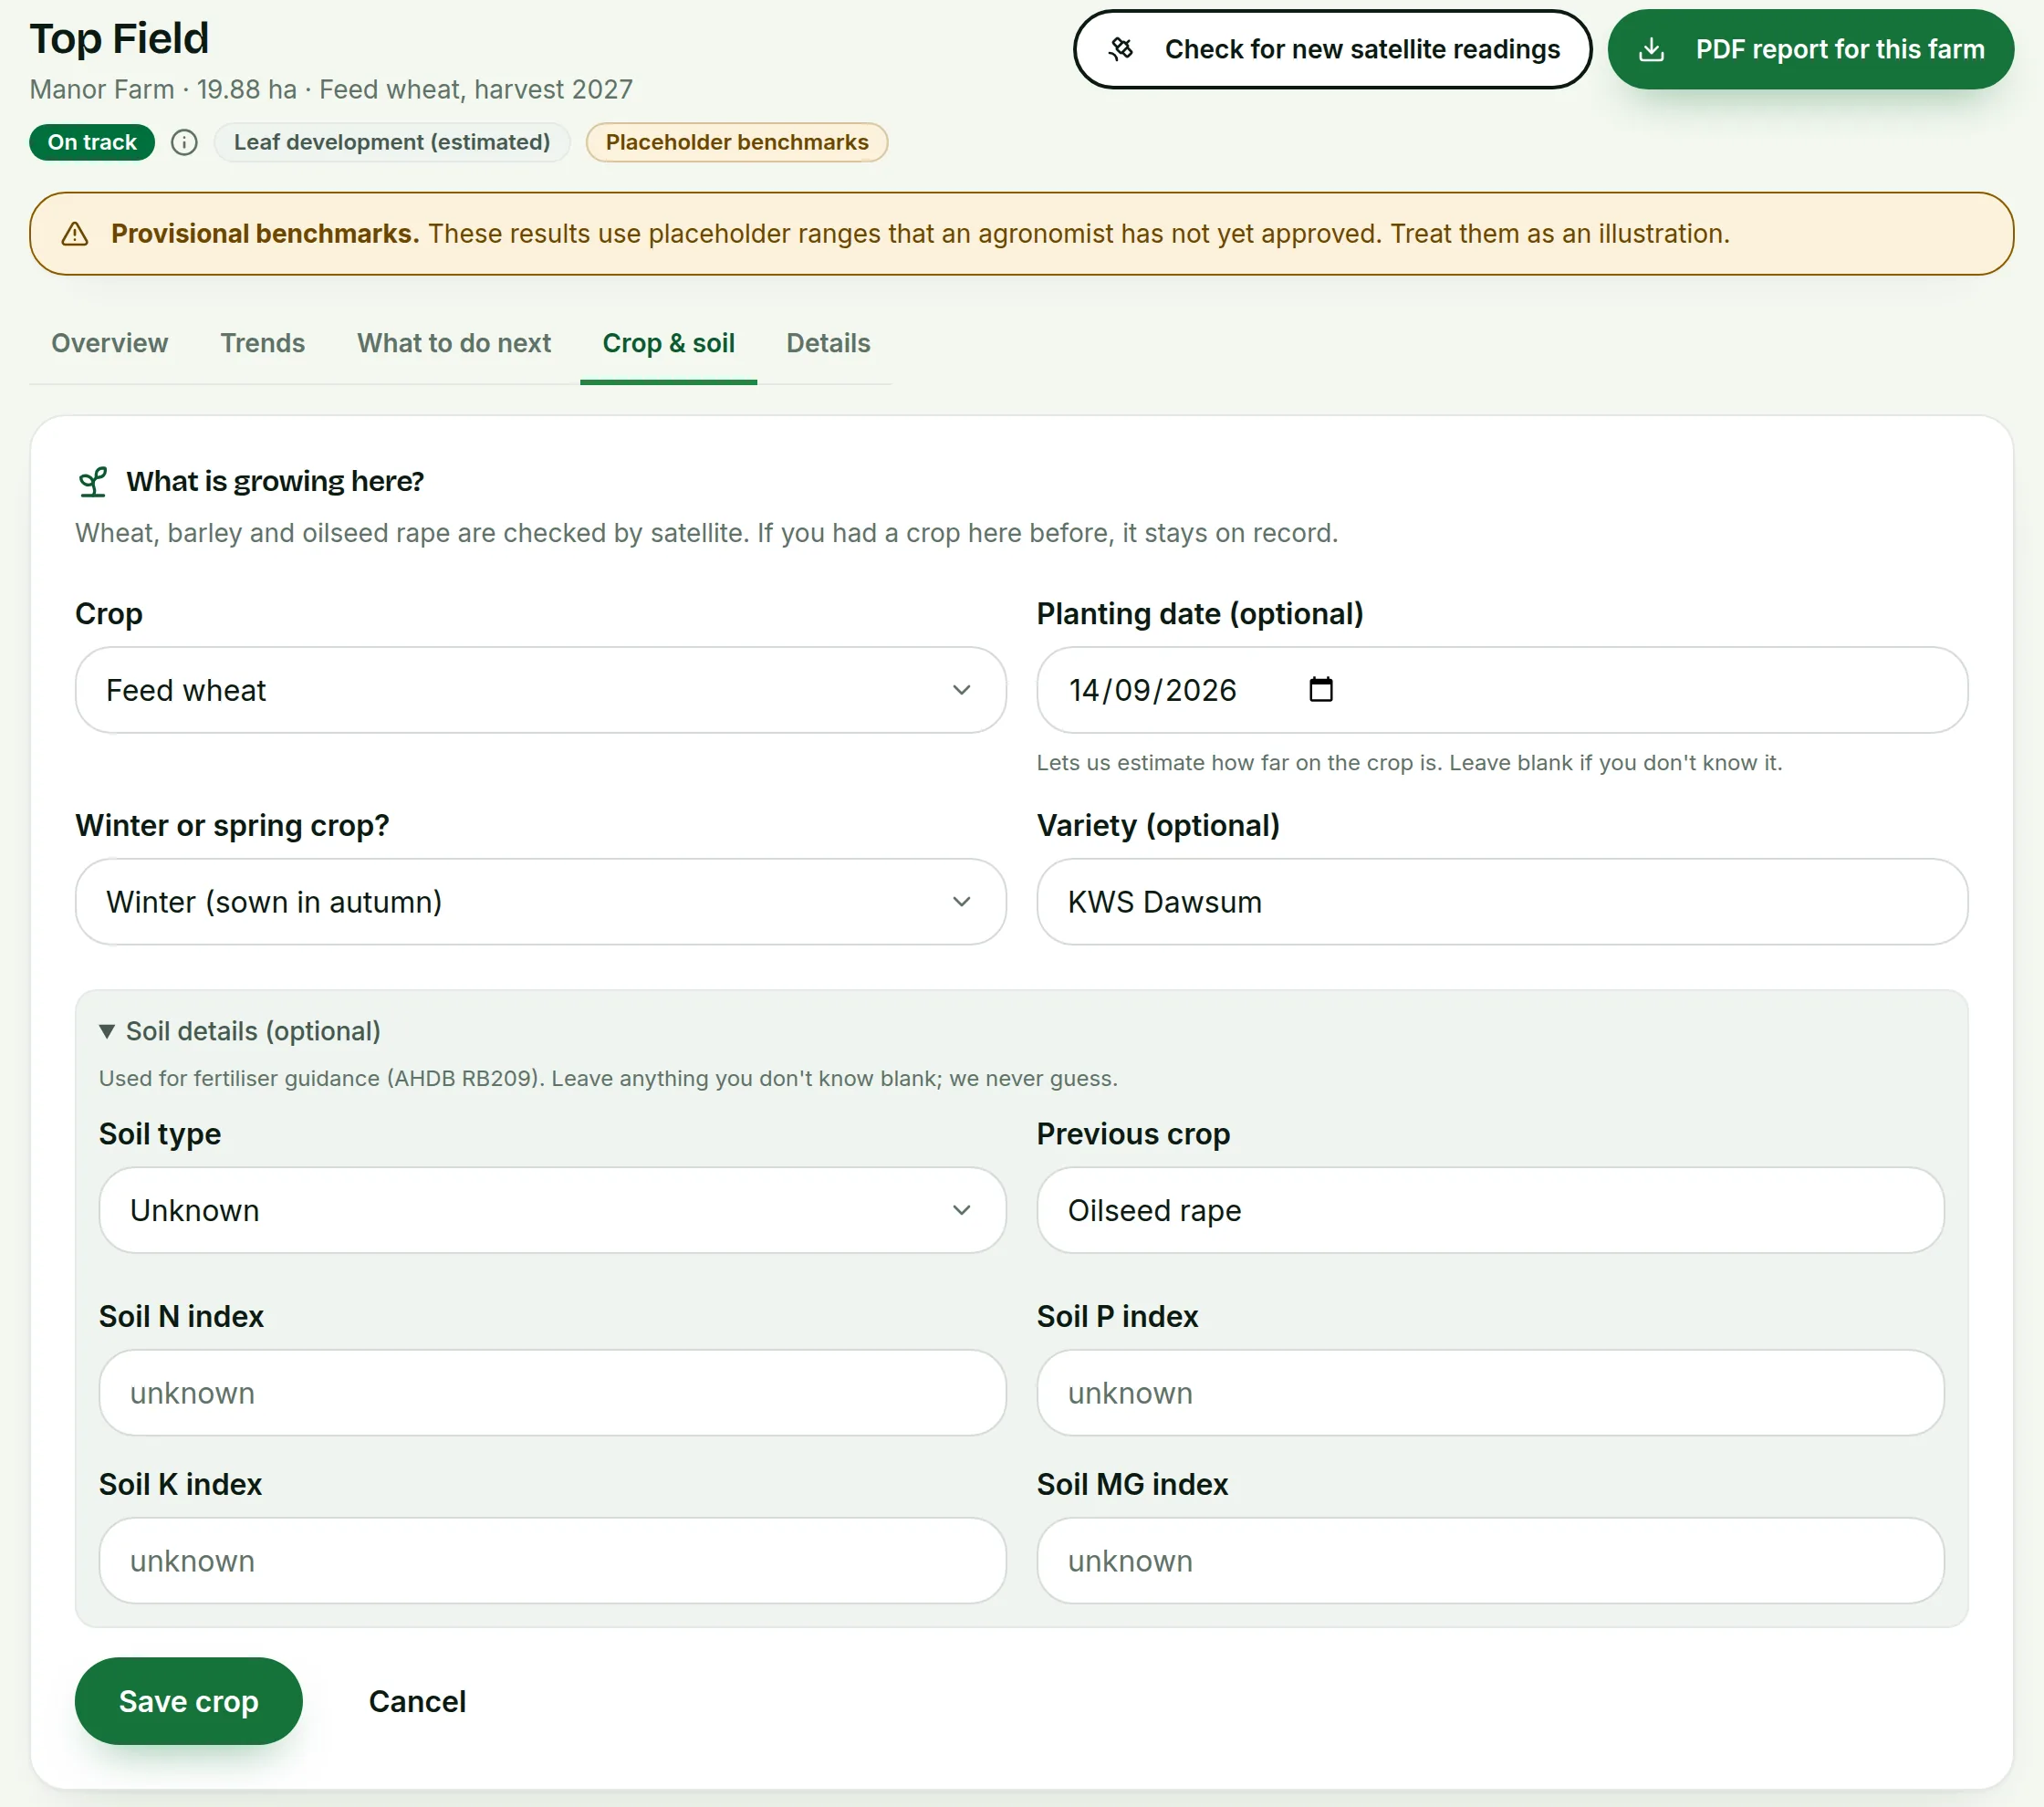 Tap to see the whole screen(opens the full-size picture)
Demo farm in the AgriSync test environment. - 4
Add the planting date
Enter the Planting date (optional). It helps AgriSync guess how far on the crop is. Leave it blank if you don't know.
- 5
Say whether it's a winter or spring crop
Under Winter or spring crop?, choose Winter (sown in autumn), Spring (sown in spring), or Not sure (we will tell from the planting date).
- 6
Add variety and soil details if you have them
Add the Variety (optional). Under Soil details (optional) you can add the Soil type, Previous crop and soil N, P, K and Mg indices. Leave anything you don't know blank. AgriSync never guesses.
- 7
Save
Press Save crop. The field's status changes after the next clear satellite picture.
How do I change the crop or planting date later?
Open the field's Crop & soil tab. Press Add planting date and soil details (or Edit planting date and soil details). Make your changes, then press Save changes. For a different crop, press Change crop. Earlier seasons stay in the table, so you can compare them.
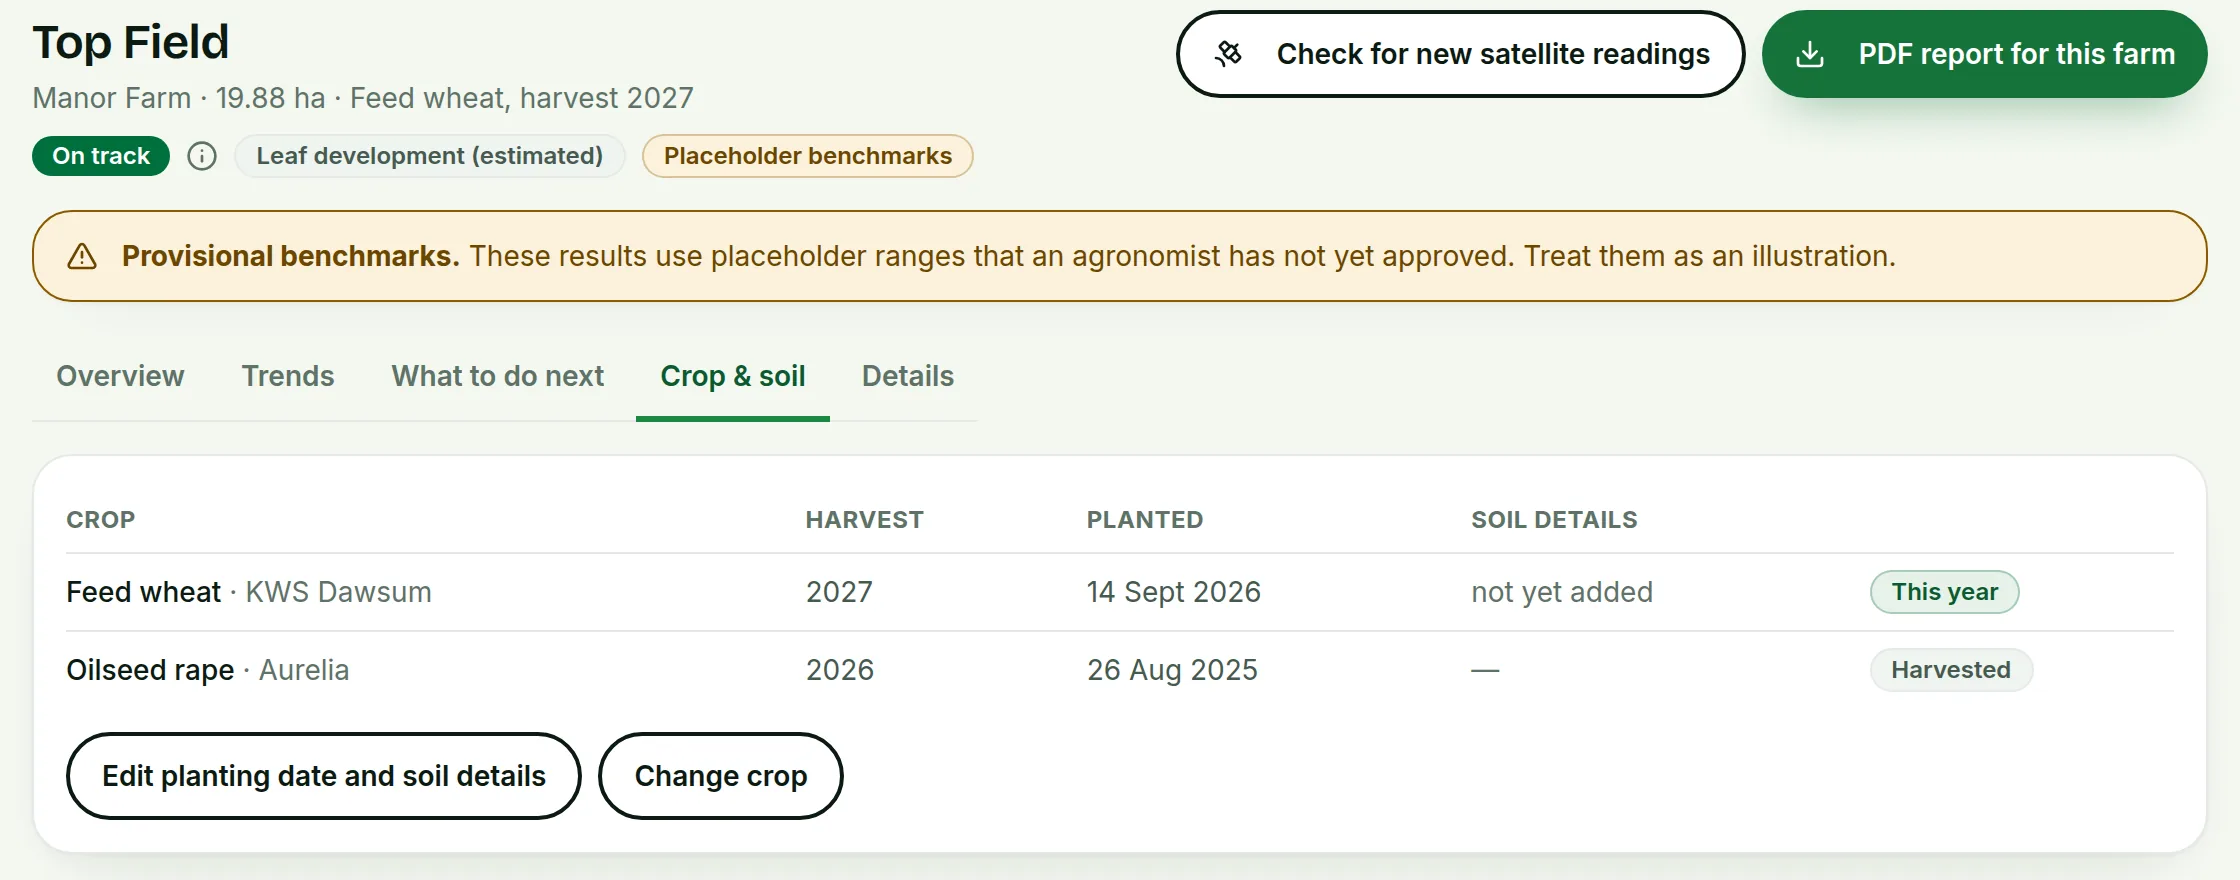 Tap to see the whole screen
What if my crop isn't on the list?
Satellite checks only cover wheat, barley and oilseed rape for now. Fields with other crops, such as oats or grass, show Not checked by satellite. You can still keep field photos and records for them.
Common questions
Do I have to know the planting date?
No, it's optional. Without it, AgriSync can't guess the growth stage. You can add it later.
What are the soil details used for?
AgriSync uses them for fertiliser advice based on AHDB RB209 (the UK fertiliser guide). They're optional.
I set the crop when I set up my farm. Do I need to do it again?
Only if the field shows Set crop or Confirm crop in Crop monitoring. Confirm crop means AgriSync has spotted a likely crop from your land data. It needs you to say if it's right.
Keep going
How-to guides
In AgriSync
Try it on your own farm
Free during early access. Start on your own, or we'll phone you and set up your fields with you.